How to Download Windows 10 on Mac for Usb
If you have serious issues with your PC and can't fully boot into Windows 10, you must either repair or reinstall the operating system to get things working once more. You need a bootable Windows 10 USB stick for that, and using another PC is the best style to create ane from scratch.
But what if you simply have a Mac at hand? As you lot may've already establish out, Microsoft'southward Media Cosmos Tool does not piece of work on macOS.
In that case, the all-time mode to create a Windows 10 bootable USB for Mac is to manually format a flash drive and copy the relevant files into information technology using the Mac'due south Concluding. There'due south a storage-related cistron at play, so the entire process tin cease up being somewhat complicated.
What Yous Need to Create a Bootable Windows 10 USB on Mac
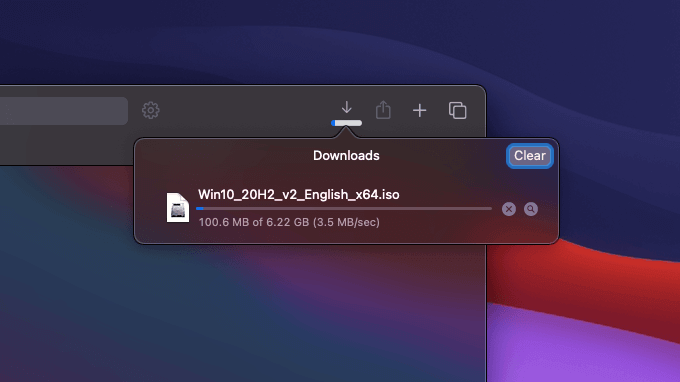
To go started, y'all must have an ISO paradigm of Windows 10 on your Mac. Information technology'due south a file that contains all the stuff that goes into the bootable Windows 10 USB stick that you're about to create. You can safely download the latest version of Windows 10 by heading over to Microsoft'southward Download Windows 10 page using Safari or a tertiary-party spider web browser.
Y'all must as well have a USB stick with at least 8GB of storage space. You will lose all data on the drive, and so do be sure to back up any of import files inside it before you lot go alee.
Additionally, yous must install HomeBrew on your Mac. Information technology's an open up-source software parcel director that y'all must and so use to add together a command line tool called wimlib. But why?
Newer Windows ten ISO images contain a file chosen "install.wim" that weighs in at over four gigabytes. The FAT32 storage format—which is the only format that Windows and macOS has in common—has a file size limitation of 4GB. With wimlib, you tin get around the limitation by splitting or compressing the "install.wim" file.
Tip: To bank check the size of the "install.wim" file, mountain the ISO paradigm (just double-click it), open the Sources binder on the pop-upward window, select install.wim, and printing Space.

If you accept an older ISO image of Windows 10 (such equally Windows 10 version 1903 or before), it may have an "install.wim" file under 4GB. In that instance, you don't accept to install HomeBrew and wimlib since y'all can re-create the file to the USB stick unremarkably.
Nevertheless, Microsoft does not make older versions of Windows x available for download in ISO format. If you practice have a re-create lying around, feel gratis to use it.
Give the Boot Campsite Banana a Try Beginning
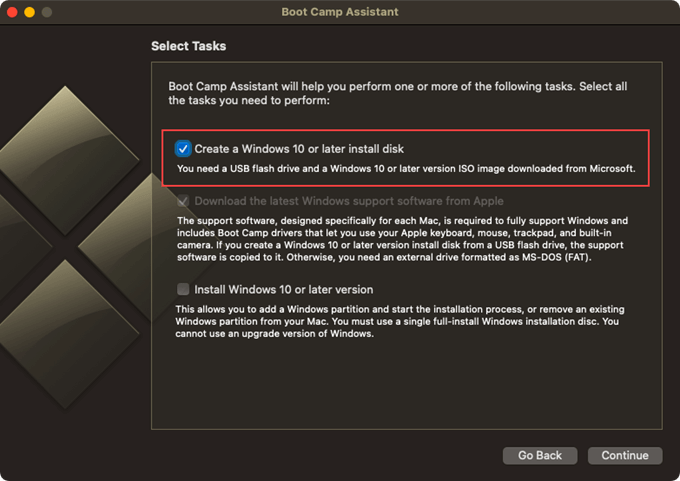
Before you go ahead, yous may want to give the Mac's Boot Military camp Assistant a try first. It comes with an pick to create bootable Windows x USB drives on a few Mac models, merely it ordinarily ends upwardly running into issues while formatting or copying files to the flash bulldoze. Information technology's still worth a shot, though.
Notation: You can't use Boot Camp Assistant on Mac's with Apple M1 chipsets.
ane. Go to Finder > Applications > Utilities and launch Boot Camp Banana.
two. Select Continue on the Introduction screen.
iii. Check the box next to Create a Windows 10 or later install deejay. Then, uncheck the box next to Install Windows 10 or later version and select Continue.
4. Select the Windows x ISO epitome from your Mac'southward internal storage and select Continue.
5. Wait until the Boot Army camp Assistant finishes creating the bootable Windows 10 USB. Then, unmount the flash drive (right-click and select Eject) from the desktop.
Continue reading and employ the Mac'due south Terminal instead if you run into whatever of the bug beneath:
- The Create a Windows 10 or afterward install deejay option is missing.
- You get An error occurred while formatting the disk bulletin.
- You get a In that location is not enough space bachelor on the disk message.
- You can't utilise the USB stick to boot into a PC.
Install HomeBrew and wimlib on the Mac
Install HomeBrew and wimlib on your Mac by running the post-obit commands in the Mac'south Concluding. If you plan to utilize an older Windows 10 ISO file with an "install.wim" file under 4GB, skip alee to the adjacent section.
ane. Get to Finder > Applications and launch Concluding.
2. Copy and paste the following command and press Enter.
/bin/bash -c "$(scroll -fsSL https://raw.githubusercontent.com/Homebrew/install/master/install.sh)"
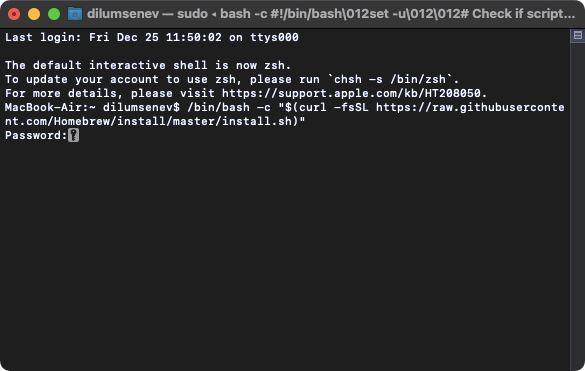
Type in your Mac user password and press Enter again to install HomeBrew. It may have several minutes.
3. Type brew install wimlib and press Enter to install wimlib.
Create a Windows 10 Bootable USB With Terminal
Once yous've finished installing HomeBrew and wimlib, use the steps that follow to create the bootable Windows 10 USB on your Mac. If you chose not to install them, and then use the alternative command in step 7 and skip stride 8.
ane. Connect the USB stick to your Mac.
ii. Open Final.
3. Blazon diskutil list and press Enter to bring up a list of all drives on your Mac.
4. Notation down the USB stick's deejay identifier—disk2, disk3, disk4, etc. Information technology should appear to the left of (external, physical).
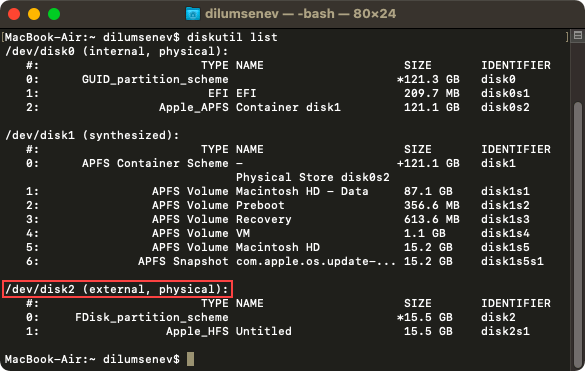
If you have multiple external drives attached, use the SIZE column to identify the USB stick.
5. Substitute the deejay identifier (disk2) at the end of the command below and use it to format the flash drive.
diskutil eraseDisk MS-DOS "WINDOWS10" MBR /dev/disk2

Annotation: If you lot run into bug later while setting up Windows 10 on a drive with a GPT (GUID Partition Table) partition scheme, use the following command instead to format the USB stick and go through the balance of the steps once more.
diskutil eraseDisk MS-DOS "WINDOWS10" GPT /dev/disk2
6. Mountain the ISO from the Downloads folder of your Mac. Make sure to substitute the file proper noun of the ISO prototype—including its file path—in the command below as needed.
hdiutil mountain ~/Downloads/Win10_20H2_v2_English_x64.iso
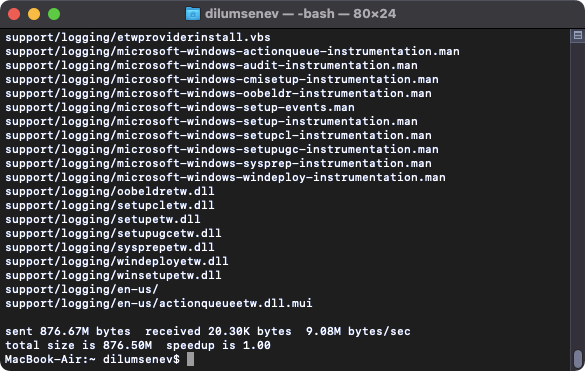
7. Copy the contents of the ISO paradigm—excluding the "install.wim" file—into the USB stick with the command below.
rsync -vha –exclude=sources/install.wim /Volumes/CCCOMA_X64FRE_EN-US_DV9/* /Volumes/WINDOWS10
If you lot mounted an ISO image with an "install.wim" file that doesn't exceed 4GB, use the following command instead to copy all the contents to the wink drive. Also, skip the side by side step.
rsync -vha /Volumes/CCCOMA_X64FRE_EN-US_DV9/* /Volumes/WINDOWS10
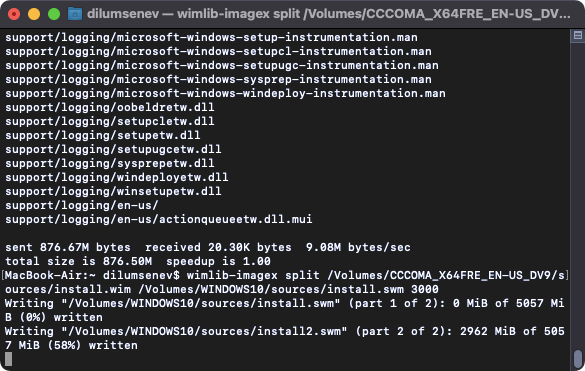
8. Use the following command to split and copy the install.wim file to the USB stick.
wimlib-imagex split /Volumes/CCCOMA_X64FRE_EN-US_DV9/sources/install.wim /Volumes/WINDOWS10/sources/install.swm 3000
Alternatively, you can use the two commands below to shrink and copy the install.wim file to the drive. However, this method can take a lot of time (up to an hour) to complete.
sudo wimlib-imagex optimize install.wim –solid
cp install.wim /Volumes/WINDOWS10/sources/install.wim
9. Afterwards Last finishes copying all files, unmount the USB from the desktop or apply the post-obit command (replace with right deejay identifier) instead.
diskutil unmountDisk /dev/disk2
You can now disconnect the USB bulldoze and apply information technology to kick into your PC. Do call up to alter the boot lodge if you haven't done that already already. The USB stick should also role every bit a bootable device on your Mac.
Kick into Your Reckoner and Offset Repairing
Did you lot manage to kicking into your computer with the USB stick? Yous probably did. If not, information technology'due south likely that your PC uses the much older BIOS (Basic Input/Output Organization) instead of UEFI (Unified Extensible Firmware Interface). Your best bet so is to install Windows 10 onto your Mac itself and use Microsoft's Media Creation Tool or a third-party utility such every bit Rufus to create a compatible bootable Windows ten USB stick.
Practice not share my Personal Data.
How to Download Windows 10 on Mac for Usb
Posted by: willisbeader.blogspot.com


0 Comments